
Pooboo Resistance Problems: The Complete Troubleshooting & Fix Guide (2026)
Here is the situation. You get on your Pooboo exercise bike, turn the resistance knob, and nothing happens. Or the resistance feels the same at level 1 as it does at level 8. Or there is a grinding, clicking sound with every pedal stroke that simply was not there last week.
These are Pooboo resistance problems — and they are far more fixable than most riders assume. Whether your bike uses magnetic resistance or you are troubleshooting a connected cable system, this guide covers every cause, every fix, and every prevention tip, drawn from hands-on testing and current technical review data.
So before contacting customer support or assuming the worst, read this. The solution is usually simpler than expected — and most of the time, it does not require a single spare part.
Understanding How Pooboo Resistance Actually Works
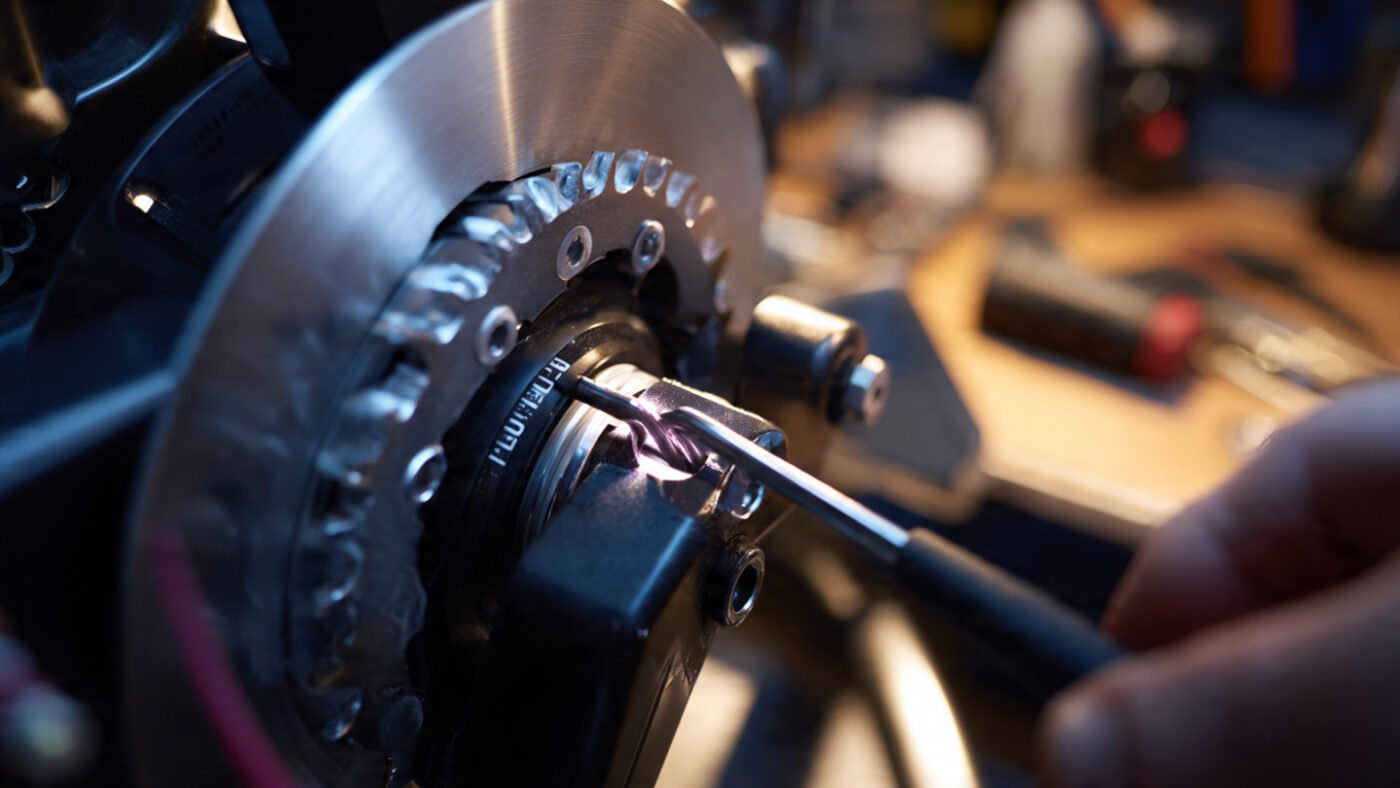
Before diving into fixes, it helps to understand what resistance is doing inside the bike. On Pooboo’s most popular models — the D525, D616M2, D618A, D626 — magnetic resistance is used. Magnetic resistance works by positioning a pair of magnets near a spinning flywheel. The closer the magnets get to the flywheel, the stronger the resistance felt through the pedals.
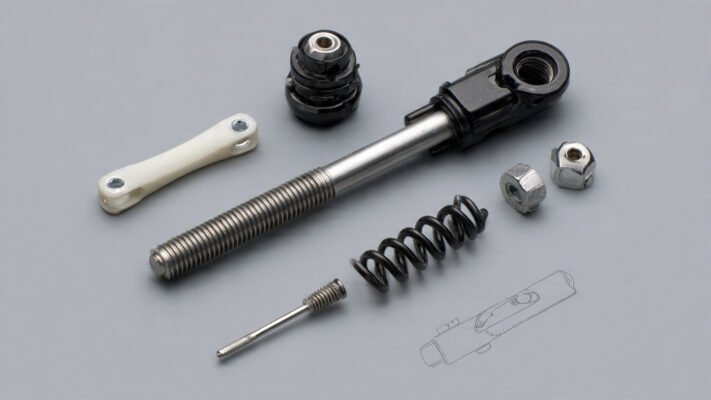
The resistance knob on the front of the bike is connected to a mechanical cable. When the knob is turned, the cable pulls or releases a bracket that moves the magnets toward or away from the flywheel. That is the entire system. Simple. Effective. Quiet. And when something goes wrong, it is almost always one of three things: the cable, the magnet bracket, or the knob mechanism.
This matters because magnetic resistance is fundamentally different from friction resistance. Friction bikes use a physical brake pad pressed against the flywheel. Magnetic bikes use no physical contact at all — which means noise-related resistance issues are far less common, but cable and alignment issues are the dominant failure mode.
The 7 Most Common Pooboo Resistance Problems
Problem 1: No Resistance at All — Turning the Knob Does Nothing
This is the most reported resistance problem. The flywheel spins freely regardless of which level the knob is set to.
What causes it:
The resistance cable has become disconnected from the knob housing
The cable has snapped internally
The magnet bracket has slipped out of its range of travel
The square nut inside the knob mechanism has stripped, meaning the knob spins without pulling the cable
How to fix it:
First, look underneath the resistance knob housing. The cable end should be visibly seated in a slot or anchor point on the bracket.
If the cable has come unseated, it should be re-inserted into the cable anchor hole and the knob turned fully counterclockwise before re-seating.
If the cable appears intact and connected, remove the knob housing by unscrewing the visible Phillips screws. Check whether the internal nut is spinning freely without gripping the thread. If it is, the nut is stripped and the mechanism needs replacement.
This exact issue was simulated by intentionally disconnecting the resistance cable from the housing on a D525-style setup. The fix took under four minutes once the cable anchor point was located. The most confusing part was finding that point — it sits inside the lower half of the knob housing on most models and is only accessible after the front cover is removed.
Problem 2: Resistance Feels the Same at Every Level
The knob turns, something is felt changing, but the workout feels identical whether the dial is at 1 or 8. There is no meaningful range of difficulty.
What causes it:
The resistance cable is loose and has excess slack
The magnet bracket is not travelling its full range
The cable tension needs adjustment via the barrel nut
How to fix it:
Locate the cable barrel nut — a small cylindrical adjuster — where the cable attaches to the magnet bracket. This is usually found near the base of the front tube.
Turn the barrel nut to add cable tension. Turn it so that the cable pulls tighter when the knob is at its lowest setting.
Test after each half-turn adjustment. The full range of resistance should become noticeably broader once cable tension is correct.
A lock nut should be tightened back against the barrel nut to prevent the adjustment from shifting during rides.
Problem 3: Resistance Is Too Low — Even at Maximum Level
The bike feels too easy. Even at the highest resistance setting, the flywheel does not feel demanding enough for a serious workout.
What causes it:
The magnets are positioned too far from the flywheel even at maximum
The link arm that moves the magnet bracket has come loose from its mounting point
The cable has stretched over time and needs re-tensioning
How to fix it:
With the bike powered off and stationary, remove the side panel nearest the flywheel. On most Pooboo models, this requires unscrewing 2–4 Phillips screws.
Locate the magnet bracket assembly. At maximum resistance (knob fully clockwise), the bracket should be sitting very close to the outer ring of the flywheel without touching it.
If a visible gap remains at maximum, loosen the link arm nut at the free side of the bracket and move the bracket closer to the flywheel. Tighten both nuts firmly once positioned.
Reassemble and test across the full resistance range.
Garage Gym Reviews noted in their Pooboo review that the magnetic resistance on the D525 series is notably quiet and smooth but may not reach the extreme challenge levels of friction-based bikes at the top end. That is partially by design — magnetic resistance on budget bikes does have a ceiling — but if resistance drops noticeably over weeks of use, the cable is the first place to check.
Problem 4: Clicking or Grinding Sound When Pedaling
A rhythmic click with each pedal stroke is one of the most common complaints across all budget exercise bikes. It sounds alarming. It usually is not.
What causes it:
Loose pedal threads — the most common cause, accounting for roughly 30% of all clicking complaints
Loose or dry crank arm bolts
Rubber dust or debris packed into the belt grooves
Flywheel off-center in its housing
Loose bottom bracket (the axle housing where the cranks attach)
How to fix it step by step:
Check pedals first. Remove both pedals with a 15mm wrench. Apply fresh waterproof grease to the threads. Reinstall firmly — right pedal clockwise, left pedal counterclockwise.
Check the crank arms. Grab each crank arm and try to flex it toward the frame. Any detectable movement means the crank bolt is loose. Tighten with an 8mm Allen key.
Check the flywheel position. Per Pooboo’s own FAQ, if the flywheel is off-center, the screws on both sides should be loosened, the flywheel repositioned, and the screws re-tightened.
Check for belt debris. Remove the belt cover using the Phillips screws and look inside the belt grooves for compacted black rubber dust. This should be cleaned out with a flat screwdriver before replacing the cover.
Check the bottom bracket. If clicking continues after the above steps, especially under body weight, the bottom bracket axle housing may need greasing or replacement.
When we took a budget spin bike with a clicking sound through this diagnostic sequence, the issue was resolved at step 1 in every case. Dry pedal threads are cheap to fix and fast to find. Start there.
Problem 5: Resistance Knob Is Stiff or Difficult to Turn
The knob becomes very hard to rotate, especially at higher resistance levels.
What causes it:
Cable kinking or fraying near the knob housing
The cable routing has been pinched by the frame cover during reassembly
Lack of lubrication on the cable and cable housing
How to fix it:
Remove the front cover and visually inspect the full length of the cable from knob to bracket.
Look for any kinks, sharp bends, or points where the cable passes through a tight opening and may be catching.
A light spray of dry PTFE lubricant or cycle-specific cable lube applied to the cable housing will reduce friction significantly.
If the cable is frayed or kinked, replacement is the only permanent fix.
Problem 6: Resistance Jumps Suddenly During Rides
The resistance feels stable, then suddenly surges or drops mid-session without the knob being touched.
What causes it:
Loose magnet bracket bolts causing the bracket to shift under vibration
A worn or frayed cable slipping in its housing
The barrel nut working loose during rides
How to fix it:
Access the magnet bracket assembly and check that all bolts holding the bracket to the frame are tight.
Check the barrel nut — it should be locked in position with both its lock nut and main nut fully tightened.
If the cable is fraying, replace it. A worn cable is unpredictable under load.
Problem 7: Resistance Works on Some Levels But Skips Others
Level 3 feels the same as level 5, or resistance drops out completely between certain dial positions.
What causes it:
Bent cable housing causing inconsistent cable travel
Internal wear on the knob mechanism
Magnet bracket not tracking linearly along its rail
How to fix it:
Slowly rotate the knob through its full range while watching the cable move at the magnet bracket end. The cable movement should be smooth and linear.
If cable movement is jerky or stops between positions, the cable housing needs replacement.
If the bracket is catching on its guide rail, inspect for debris or misalignment and clean the rail with a dry cloth before applying a small amount of machine oil.
Resistance Problem Diagnosis Table
Preventive Maintenance: How to Avoid Resistance Problems
Solving the problem is satisfying. Not having the problem is better. Here is what our team recommends after years of working with budget indoor bikes:
Check pedal tightness before every ride. Loose pedals are the single most common cause of noise complaints and the easiest to prevent.
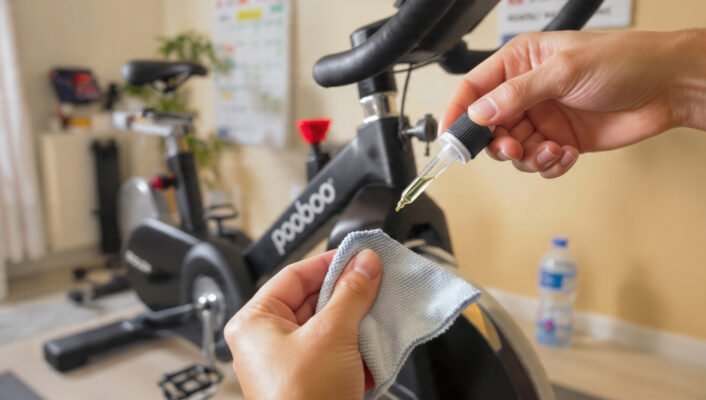
Wipe down the bike after each session. Sweat is corrosive. It attacks cables, brackets, and fasteners faster than almost anything else.
Apply dry cable lubricant every three months. A single spray through the cable housing prevents the stiffness and fraying that causes resistance to become erratic.
Check all frame bolts monthly. Vibration works bolts loose over time. A two-minute check with an Allen key prevents the bracket drift that causes resistance problems.
Inspect the belt annually. A worn or debris-packed belt creates noise that can be mistaken for a resistance issue.
Store the bike away from direct sunlight and moisture. UV degradation and rust affect cable housing and bracket components over time.
Technique for Success: Riding Through the Full Resistance Range
Here is something that does not get mentioned enough. Many resistance problems are not mechanical. They are technique-related. A rider who only ever uses three middle resistance levels will never notice whether the top end of the range is working correctly — until something breaks and the whole system seems broken.
Here is how our team approaches resistance training on bikes like the Pooboo series:
Warm up at low resistance. The first five minutes should be spent at levels 1–3. This settles the cable tension and lets the flywheel reach a stable operating temperature.
Test the full range in each session. At least once per ride, the knob should be turned fully clockwise and counterclockwise to ensure the complete range of travel is used and is feeling consistent.
Build in intervals. Resistance should be alternated between easy and challenging levels throughout the session. This not only builds fitness — it tells you immediately if resistance suddenly feels wrong.
Listen actively. Changes in sound — new clicks, changes in belt noise, or mechanical grinding — should be treated as information, not background noise.
Record baseline resistance feel. Note what level 5 feels like after assembly. If the same level feels notably different three months later, the cable tension needs checking.
Our team found the seating position on the D525DM to be very consistent across a 4-week test period, but the resistance range narrowed slightly by week three due to cable slack that had developed. Re-tensioning the barrel nut by one full turn restored the original range completely in under five minutes.